Remote Powershell on Azure virtual machine over internet
By Mirek on (tags: azure, Powershell, categories: azure, tools, security)In this post I will show you a step by step guide to enable Powershell remoting functionality on the virtual machine running Windows Server 2012R2. Then I will show you how to start a powershell session from a machine over the internet using a secure connection.
So the goal is to manage an Azure virtual machine with powershell remoting on a virtual machine. Since the virtual machine and our local computer are not in a secure network (connect via internet) we want to use a SSL certificate to make the connection safe.
What we first need to do is to enable powershell remoting. Note that in Windows Server 2012R2 this is already done by default.
On the remote machine start the Powershell as the administrator and run Enable-PSRemoting command
For all the prompts you can press enter which indicates acceptance as default.
Since by default powershell is listening on unsecure http protocol, we need to change that. So next we create the test certificate, store it in a local certificate store and also put it as a reference in a variable. Since Powershell 4.0 we have a cmdlet for that
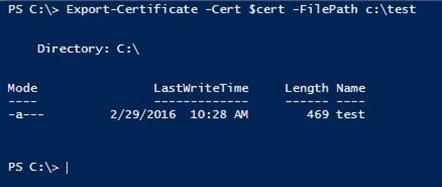
Note that as a dns name we must provide a fully qualified domain name. If we have a certificate as a file we can easilly import it using Import-Certificate instead of using the self-signed one. After that we need to export the certificate to a file so we can later on import it on a local computer.
Next we need to add a powershell listener on HTTPS providing the certificate we’ve just created
Since WSMan listener is listening on port 5986 for HTTPS we need to open this port in the firewall for incoming traffic.
That’s all that is required to enable powershell remoting on the remote machine. To be sure that no one is using HTTP connection we can remove the HTTP listener and disable the HTTP firewall rule for port 5985. Those two settings are automatically added by the Enable-PSRemoting command.
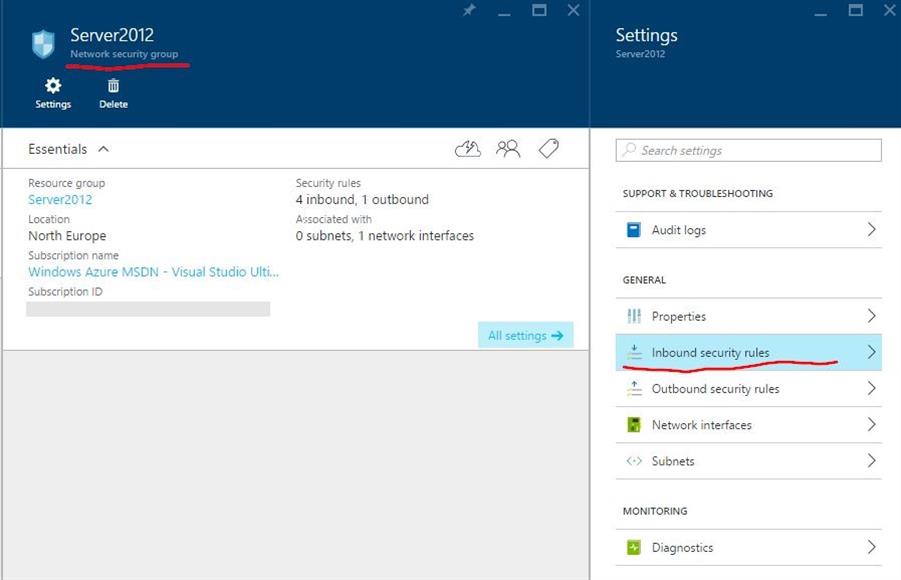
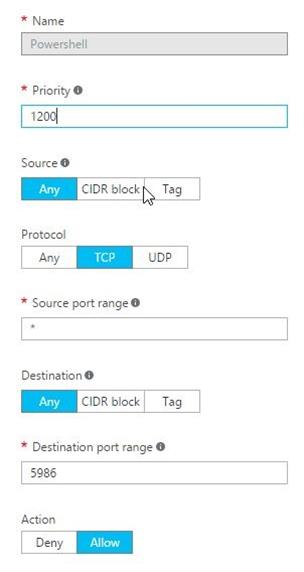
Next thing we have to do is adding a firewall rule in azure portal. We login to the portal and find a place where inbound security rules are defined. If you are using the new Resource Manger in Azure portal then you have a group called Network security group associated to your virtual machine. Open it and add new inbound security rule.
Important note: For production you should add an IP constrain to the rule by setting a proper source CIDR block.
Now we are ready to configure local computer. Copy the certificate file and import it into the certificate store
Now we are ready to start a powershell session
You will be prompted for a credentials to connect the remote computer.

 back
back


