Signing ClickOnce with password protected PFX certificate
By Mirek on (tags: certificate, ClickOnce, deployment, Mage.exe, tfs, categories: tools, infrastructure)This time I had to find out how to make the TFS build step use a PFX certificate file to sign the ClickOnce manifest. It turned out to be quite a tricky task though.
But let me first describe the situation.
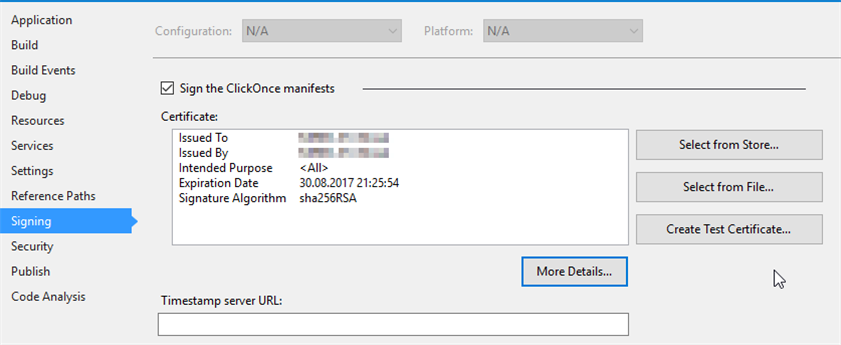
Normally when you want to sign the ClickOnce manifests you need to go the the project properties in Visual Studio and in Signing tab provide an appropriate certificate
The certificate is added to the source code and available during the build process.
When you want to provide a different certificate during the build process you have the possibility to pass a special argument to the msbuild command line as it was explained here.
There is one side effect though. To use a certificate in above approach we need to have our certificate installed on the build machine certificate store. If this behavior is not acceptable by the deployment process we have no other way than one described below.
Since msbuild does not accept a password protected PFX certificate file that is not installed on a local cert store we need to split the deployment process in to two steps. First we let the msbuild to build the application without signing it and then we use a Manifest Generation and Editing Tool to resign the application deployment with a certificate file.
So first we modify the msbuild arguments by setting this
/p:SignManifests=False
and removing this
/p:ManifestCertificateThumbprint=9FD73371DCD74A95A0C6A758D4CCA2ACFD5EC68C
Then msbuild will create the deployment for us but wont sign it.
Next we need to perform following steps assuming we have a mage.exe and signtool.exe tools available in the path. Our exmple application is called eidias.wpfapp here.
- Go to the folder containing deployed application
- Sign the setup.exe with signtool.exe
- Sign the eidias.wpfapp.exe.deploy with signtool.exe
- Sign the ..\Application Files\eidias.wpfapp_1_1_0_0\eidias.wpfapp.exe.deploy with signtool.exe
- Remove the .deploy extension from all of the deployment files
- Now is the last moment we can eventually change anything in files content. For example modifying config files.
- Update the application manifest ..\Application Files\eidias.wpfapp_1_1_0_0\eidias.wpfapp.exe.manifest with mage.exe and –Update command
- Update the deployment manifest eidias.wpfapp.application with mage.exe and –Update command
- Reattach the .deploy extensions for all files except *.manifest in supdirectory ..\Application Files\eidias.wpfapp_1_1_0_0\
That’s it.
I’ve packed all of this stuff into a TFS build step and attached to this post, enjoy!
More information regarding manual ClickOnce deployment can be found here.

 back
back
