Implementing really invisible reCaptcha
By Mirek on (tags: ASP.NET, core, reCaptcha, categories: code, security)In this post I will show you a quick tutorial of implementing Google reCaptcha v2 invisible on the ASP.NET Core website form.
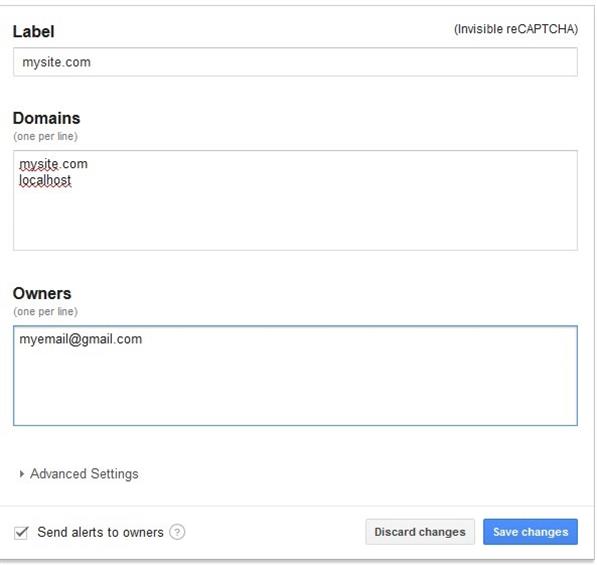
First, what we need is the Google account and reCaptcha keys for our site. This is quite straignt forward and you can easilly follow these instructions. Two important things here though
- You have to select reCaptcha V2 Invisible
- In the domains box you have to type in your site public domain and optionally the localhost so you are able to test the recaptcha functionality on your local environment
As a result we will have our reCaptcha site key and site secret which we have to store somewhere in our application. For ASP.NET Core the recommend way to store secrets is to use Secret Manager.
We can start implementing the reCaptcha on our form. The simplest way to do it is by binding the reCaptcha widget to the submit button automatically. According to Google’s docs all we need to do on the client side is
- Load api script by including following line in the script section
<script src="https://www.google.com/recaptcha/api.js" async defer></script>
- Decorate our form’s submit button with few attributes, like so
<input type="submit" value="Send"
       class="g-recaptcha"
       data-callback="submitContactForm"
data-sitekey="@Configuration["reCAPTCHA_Key"]" /> - Implement the submitContactForm method which will programatically submit the form.
When the api script loads it finds first element of class g-recaptcha and binds itself to the submit event of containing form. When the submit button is pressed by the user, the reCaptcha executes the check. For most cases it will pass without showing the chellange to the user and for any suspicious requests the challenage test will be displayed. After all the veryfication token is attached to the form as a hidden field named g-recaptcha-response and the callback method is called.
function submitContactForm(token) {
        $("#contactForm").submit();
}
By the way you can use this method to do some extra form validation.
Now when we have the recaptcha response token already in the form, we have to test it on the server side. Assume we have simple action which handle the form request like so
[HttpPost]
[ValidateAntiForgeryToken]
public async Task<ActionResult> Index(ContactFormModel model)
{
     if (!ModelState.IsValid || !(await CheckReCaptchaResponseAsync(Request)))
     {
          TempData["Message"] = "Something went wrong!";
     }
     else
     {
          /*process contact model here*/
          TempData["Message"] = "Contact form succesfully submitted!";
     }
     return View();
}
and the actuall reCaptcha response check
public Task<bool> CheckReCaptchaResponseAsync(HttpRequest Request)
     => CheckReCaptchaResponseAsync(Request?.Form["g-recaptcha-response"]);

public async Task<bool> CheckReCaptchaResponseAsync(string rcResponse)
{
   var secret = Configuration["reCAPTCHA_Secret"];

   if (string.IsNullOrWhiteSpace(secret))
       return true;
   if (string.IsNullOrWhiteSpace(rcResponse))
      throw new ApplicationException("reCaptcha response is missing.");

   using (var client = new HttpClient())
   {
      var content = new FormUrlEncodedContent(new Dictionary<string, string>
                 { { "secret", secret }, { "response", rcResponse } });
      var response = await client.PostAsync("https://www.google.com/recaptcha/api/siteverify", content);
      var responseString = await response.Content.ReadAsStringAsync();
      var jReponse = JObject.Parse(responseString);

      if (!bool.TryParse((string)jReponse["success"], out bool success) || !success)
          return false;
      return true;
   }
}
As you can see, we need to make a call to the Google server , passing the reCaptcha token and our site secret. As a response we get a json object with success flag and optional error details. See this section for more info.
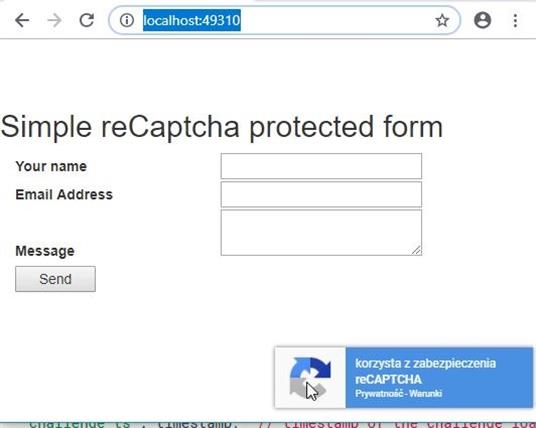
As you can see integrating reCaptcha is quite straight forward. But one thing that might be annoying is this flying sticker which is generated by the reCaptcha API.
According to Google Terms of Use , you had to accept when creating the reCaptcha keys, there is no way you can hide this box. This is really bad, especially because you cannot even style it to somehow stick to your page design. This is an iFrame and it’s modifications are limitted.
Fortunatelly there is an alternative. As wrote on reCaptcha FAQ here you can hide the reCaptcha widget as long as you inform the user that your site is using reCaptcha. Basically you will have to include these lines in your html
This site is protected by reCAPTCHA and the Google
    <a href="https://policies.google.com/privacy">Privacy Policy</a> and
    <a href="https://policies.google.com/terms">Terms of Service</a> apply.
Now it’s just as simple as adding a css rule, which will hide the reCaptcha widget on our site.
.grecaptcha-badge {
     display: none;
}
That’s it. You can find the full solution sources in the attachement

 back
back


Nick Hill
11/20/2019 11:55 PM
The "Send" button does not respond if you have triggered form validation (ex: no email address). It becomes available again when the recaptcha expires. Can you augment your example to make the "Send" button work immediately after initial submit?