Taming TFS – The big picture
By eidias on (tags: tfs, categories: infrastructure)This is the second post from Taming TFS series. What I’d like to do here, is to give the big picture on how tfs operates, what it utilizes and how to use that. If you’re already familiar with the basics, you can skip this post, if not, then consider yourself invited to read on.
There is one thing I need to clarify at the beginning. By “TFS” I will be mostly referring to the Team Build part of tfs, as that’s what’s the main interest. The source control is just like any other – it has it’s traits, that you need to get used to but that is not the subject here. There are some added features (like the SharePoint portal) but to be honest, I don’t really use them or care about them. For me, working with TFS means performing everyday code development activities and in order not to worry about where and how my web project is going to be deployed or what to do if I want to deploy it, I needed to do some changes – and these changes will be described in the series.
Another thing worth mentioning is that at the moment of writing this post, we’re using TFS 2010 which (in the sense of Team build) is very different from the previous version.
The use case
For me, a normal development day consists of a few things:
- Check what needs to be done
- Get latest source
- Do some work
- code changes
- check in
- check if the build was successful
- Test the changes
These activities touch a few features available in TFS
- Work item tracking
- Source control
- Builds
Let’s start from the top
Work item tracking
When you set up a team project it’s possible to select a template for it. The template contains definitions for things like types of work items, possible transitions between them, the properties that are made available and things like that.
There are 2 default templates available:
- MSF for Agile Software Development
- MSF for CMMI Process Improvement
Depending on your preferences, you may or may not be satisfied with these. We were not, so we decided to use the Microsoft Visual Studio Scrum template. It’s pretty lightweight and suits our needs.
After selecting a team project template, there are things like specification, tasks and issues available for distribution among team members. This allows to organize the work and keep track of it.
Source control
As I wrote earlier, I won’t go into the details of source control in TFS, but there are a couple of things worth mentioning.
TFS is integrated into visual studio – this is both good and bad. The good side is that all of it’s features (well, not all, but most of them) are available in the IDE itself, so activities like check-in, get latest, branch or merge are there. The bad side is, that if you used anything else than visual studio to modify the source, then you’ll need to do some extra work to push it to the server.
The vcs uses a locking mechanism, although it’s not as ‘strict’ as it was in visual source safe. You do ‘check out’ files when you start editing them, but that does not mean that it’s not possible to check in changes to that file by another developer (unless you lock it explicitly).
Builds
The build system will be something that I’ll talk most about. It allows a project administrator to configure automated builds, check-in policies and other things that come in handy.
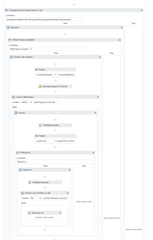
Compared to the 2008 version where MSBuild was used, the build system in version 2010 is based on Microsoft Workflow Foundation. That means much longer templates and more work for the admin – but we’ll get to that soon. The bottom line is, that when configured properly, it relieves the developer from repetitive tasks allowing to focus on what’s more important – coding. Here’s a screenshot of how a build template looks like, and it’s actual form – xml.
Hope this gave an good enough overview. In future posts, I’ll show you some things I have done with the default build template.
Cheers

 back
back

